Victoria Falls Photography Guide: How to Capture the Perfect Shot
Master Victoria Falls photography with our complete guide to viewpoints, camera settings, timing, and techniques for stunning waterfall shots.
Victoria Falls Photography Guide: How to Capture the Perfect Shot
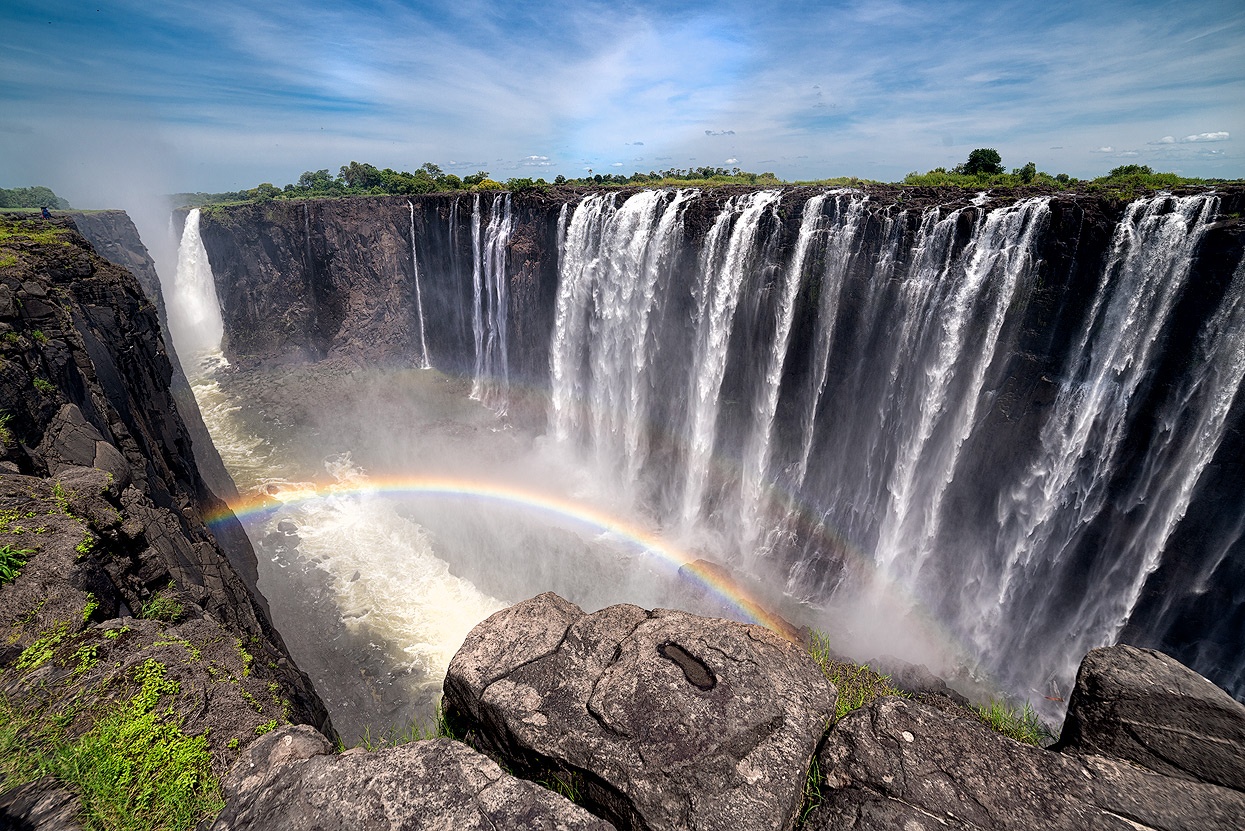
Victoria Falls presents both an incredible opportunity and a significant challenge for photographers. The combination of massive water volume, constant mist, dramatic lighting, and stunning rainbows creates conditions unlike anywhere else on Earth. Whether you're a professional photographer with high-end gear or a smartphone enthusiast wanting great vacation shots, this comprehensive guide will help you capture the magic of "The Smoke That Thunders."
Understanding the Photography Challenges
Before diving into techniques and locations, it's important to understand what makes Victoria Falls uniquely challenging to photograph. The primary obstacle is the mist – during high water season (February-July), the spray can be so intense that keeping your lens dry for more than a few seconds becomes nearly impossible at many viewpoints.
The second challenge is the extreme contrast between bright sky, white water, dark rock faces, and shadowed gorges. Your camera's sensor will struggle to capture the full dynamic range, often resulting in blown-out highlights or crushed shadows.
The third factor is the sheer scale. Victoria Falls stretches 1,708 meters wide and drops up to 108 meters. Capturing this immensity in a single frame while maintaining impact requires careful composition and often multiple shots stitched together.
Understanding these challenges helps you prepare properly and adjust your expectations. The good news? With the right approach, you can capture absolutely stunning images that do justice to this natural wonder.
Best Times for Photography
Time of Day
Golden Hour (Sunrise and Sunset): The hour after sunrise and before sunset provides the most beautiful warm light. Morning light (around 6:00-7:30 AM) is particularly magical, with fewer crowds and often calmer conditions. The low angle of light creates dimension and brings out textures in the mist and water.
Midday (10:00 AM - 2:00 PM): While often dismissed by photographers, midday light at Victoria Falls has a secret advantage – this is prime rainbow time. When the sun is high and strong, the mist creates spectacular rainbows, including the possibility of double and triple rainbows. The trade-off is harsher light and more contrast.
Overcast Days: Don't dismiss cloudy weather. Overcast conditions provide even lighting that's excellent for capturing the falls without extreme contrast. The mist becomes more visible against grey skies, creating moody, atmospheric shots.
Lunar Rainbow (Moonbow): During full moon nights in high water season (April-July), you can photograph the rare lunar rainbow. This requires long exposures, a sturdy tripod, and clear skies, but the results are otherworldly.
Time of Year
High Water Season (February-July): Dramatic and powerful, but challenging due to intense spray. April-May offers maximum water volume. June-July provides excellent flow with slightly less spray.
Low Water Season (August-January): Much easier photography conditions with clear viewpoints and no spray on your lens. September-November is ideal for crisp, clear shots showing the falls' structure.
For detailed seasonal considerations, check out our guide on visiting Victoria Falls in high season vs low season.
Essential Equipment
Camera Bodies
DSLR or Mirrorless: A camera with weather sealing is highly recommended for high water season. The ability to shoot in RAW format is essential for managing the extreme dynamic range.
Smartphone: Modern smartphones can capture excellent images, especially during low water season. Use a waterproof case during high water months, and take advantage of HDR modes for better dynamic range.
Lenses
Wide-Angle (16-35mm full frame equivalent): Essential for capturing the breadth of the falls. A 16-24mm lens allows you to include the full width from certain viewpoints.
Standard Zoom (24-70mm): The most versatile option, allowing you to capture both wide scenes and tighter compositions of specific sections.
Telephoto (70-200mm or longer): Useful for isolating details, capturing rainbows, and shooting from the Zambian side where you're further from the falls. Also excellent for wildlife photography on safari experiences.
Prime Lenses: A fast prime (like a 35mm f/1.8 or 50mm f/1.8) is useful for low-light situations and creating depth in foreground compositions.
Essential Accessories
Sturdy Tripod: Necessary for long exposures, HDR bracketing, and low-light photography. Carbon fiber is lighter for hiking between viewpoints.
Lens Cleaning Cloth and Blower: You'll use these constantly during high water season. Bring multiple microfiber cloths.
Rain Cover or Waterproof Housing: Essential during high water season. Even a simple rain sleeve can protect your gear from the constant spray.
Polarizing Filter: Reduces glare on water, enhances rainbows, and can help manage contrast. However, it reduces light by 1-2 stops, so use judiciously.
Neutral Density (ND) Filters: For creating silky water effects with long exposures during bright conditions. A 3-stop or 6-stop ND filter is useful.
Extra Batteries and Memory Cards: The mist and temperature changes drain batteries faster. Always carry spares.
Dry Bag or Waterproof Backpack: Protect your gear when moving between viewpoints during high water season.
Camera Settings for Victoria Falls
Basic Settings
Shooting Mode: Start with Aperture Priority (A/Av mode) for most situations, giving you control over depth of field while the camera handles shutter speed. Switch to Manual mode when you need full control, especially for long exposures or tricky lighting.
ISO: Keep as low as possible (ISO 100-400) for maximum image quality. The abundant light at Victoria Falls usually allows low ISO settings. Increase only when necessary for faster shutter speeds or in low light.
White Balance: Auto white balance works well in most conditions, but consider using Cloudy or Shade presets to warm up the tones. Shoot in RAW format so you can adjust white balance in post-processing without quality loss.
Aperture Settings
For Maximum Sharpness Throughout (f/8-f/11): When you want both foreground elements and the falls in sharp focus, use f/8 to f/11. This is ideal for wide-angle landscape shots.
For Foreground Emphasis (f/2.8-f/5.6): When including foreground elements like vegetation or rocks, a wider aperture creates depth and draws the eye to your subject before leading to the falls.
For Maximum Depth of Field (f/16-f/22): When you need everything from near to far in focus, use smaller apertures. Be aware of diffraction reducing sharpness at very small apertures (f/22 and beyond).
Shutter Speed Settings
Freezing Motion (1/500s or faster): To capture individual water droplets and freeze the action, use fast shutter speeds. This creates a different aesthetic than the classic silky water look.
Silky Water Effect (1/4s to 2s): The classic waterfall look with smooth, flowing water. Requires a tripod and possibly an ND filter in bright conditions. Start with 1/2 second and adjust based on the effect you want.
Long Exposure (2s to 30s): For dramatic, ethereal effects with the mist becoming a soft cloud. Requires tripod and ND filters. Excellent for creating mood and emphasizing the power of the falls.
Moonbow Photography (15s to 30s): For capturing lunar rainbows during full moon nights, use long exposures with your camera on a tripod. ISO 800-1600 may be necessary.
Exposure Compensation
The bright mist and water often fool your camera's meter into underexposing. Start by adding +0.3 to +1.0 EV exposure compensation and check your histogram. Aim to expose to the right (ETTR) without blowing out highlights, then recover shadows in post-processing.
HDR and Bracketing
The extreme dynamic range at Victoria Falls makes HDR (High Dynamic Range) photography particularly effective. Set your camera to bracket exposures (typically -2, 0, +2 EV) and merge them in post-processing for images that capture detail in both bright mist and dark shadows.
Best Viewpoints: Zimbabwe Side
The Zimbabwean side offers closer, more dramatic views of the falls with 16 designated viewpoints along a paved path through the rainforest. Here are the photography highlights:
Viewpoint 1-3: Devil's Cataract
The first section you encounter offers excellent views of the Devil's Cataract, the westernmost section of the falls. During low water season, this area maintains good flow and provides opportunities for compositions including the gorge and surrounding landscape.
Best for: Wide-angle shots capturing the gorge, morning light, fewer crowds early in the day.
Challenges: Can be very wet during high water season.
Viewpoint 5-7: Main Falls
These viewpoints face the Main Falls, the highest section at 93 meters. During high water season, the spray here is intense, making photography extremely challenging but rewarding.
Best for: Capturing the sheer power and height of the falls, rainbow photography in midday sun.
Challenges: Intense spray during high water season – you'll get drenched, and keeping your lens dry is nearly impossible.
Viewpoint 8-9: Horseshoe Falls
Excellent vantage points for capturing the curve of the Horseshoe Falls section. These viewpoints offer some of the best compositions on the Zimbabwe side.
Best for: Classic postcard shots, capturing the curve and structure of the falls, rainbow photography.
Challenges: Very popular, so expect crowds during peak times.
Viewpoint 12-13: Rainbow Falls
Named for the spectacular rainbows visible here during midday, these viewpoints offer stunning views across to the Zambian side.
Best for: Rainbow photography (10 AM - 2 PM), wide-angle shots including both sides of the gorge.
Challenges: Spray can still be significant during high water season.
Viewpoint 15: Danger Point
The furthest viewpoint offers a unique perspective looking back along the falls and down into the gorge where the bungee jumping bridge is visible.
Best for: Dramatic gorge shots, including the bridge for scale, afternoon light.
Challenges: Long walk from the entrance, can be crowded.
Viewpoint 16: Cataract View
The final viewpoint provides a panoramic view across the entire falls from the eastern end.
Best for: Panoramic shots, capturing the full width of the falls, sunset photography.
Challenges: Distance from the falls means you'll need a longer lens for detail shots.
Best Viewpoints: Zambia Side
The Zambian side offers fewer viewpoints but provides unique perspectives, including the famous Knife Edge Bridge and access to Livingstone Island and Devils Pool.
Knife Edge Bridge
This narrow bridge extends out toward the falls, offering thrilling views directly into the chasm. The perspective here is unique – you're looking along the falls rather than at them.
Best for: Dramatic compositions with the bridge as a leading line, capturing the depth of the gorge, brave selfies.
Challenges: Can be slippery and crowded, spray during high water season.
Eastern Cataract Viewpoint
Offers views of the Eastern Cataract and across to the Zimbabwe side.
Best for: Wide-angle shots capturing both sides, rainbow photography, less crowded than Zimbabwe viewpoints.
Challenges: Further from the main falls, requires longer lenses for close-up shots.
Livingstone Island and Devils Pool
Accessible during low water season (roughly August-January), Livingstone Island offers the ultimate photography opportunity – shooting from the very edge of the falls.
Best for: Unique perspectives impossible from anywhere else, dramatic edge-of-the-world shots, combining adventure with photography.
Challenges: Only accessible during low water season, requires booking a tour, challenging to keep gear dry even during low water.
Aerial Photography Perspectives
Some of the most spectacular Victoria Falls photographs come from the air. Both helicopter flights and microlight flights offer incredible photography opportunities.
Helicopter Photography Tips
Window Seats: Request a window seat and ask the pilot about the best side for photography based on the sun's position.
Camera Settings: Use fast shutter speeds (1/1000s or faster) to counter vibration. Shoot in continuous mode to capture multiple frames.
Lens Choice: A 24-70mm zoom is ideal, allowing you to capture both wide scenes and tighter compositions without changing lenses.
Technique: Shoot through the window (not around it) to avoid reflections. A polarizing filter can help reduce glare but may create odd patterns on curved helicopter windows.
Timing: Morning flights (7:00-9:00 AM) offer the best light and often calmer air. High water season provides the most dramatic aerial views.
Microlight Photography
Microlight flights offer open-air photography without windows, but the wind and vibration present challenges.
Secure Your Gear: Use a wrist strap or neck strap – dropping your camera is a real risk.
Fast Shutter Speeds: Use 1/1000s or faster to counter vibration and movement.
Protect Your Gear: Bring a protective bag for takeoff and landing when dust can be an issue.
Drone Photography Regulations
Drone photography at Victoria Falls is heavily restricted and requires special permits from both Zimbabwean and Zambian authorities. The falls are in a national park, and unauthorized drone use is illegal and can result in confiscation of equipment and fines.
If you're serious about drone photography, contact the Zimbabwe Parks and Wildlife Management Authority or Zambia Wildlife Authority well in advance to inquire about permits. Be prepared for a lengthy application process and significant fees.
For most visitors, the hassle and expense of obtaining drone permits isn't worthwhile, especially given the excellent aerial photography opportunities available through helicopter flights.
Composition Techniques
Including Foreground Elements
Don't just point your camera at the falls – include foreground elements like rainforest vegetation, rocks, or the viewing path to create depth and context. This technique makes your images more engaging and helps convey the scale of the falls.
Using Leading Lines
The gorge, the bridge, pathways, and the curve of the falls themselves provide natural leading lines that draw the viewer's eye through your composition.
Capturing Scale
Victoria Falls is massive, but photographs can flatten this sense of scale. Include people, trees, or the bridge in your shots to provide scale reference.
Rainbow Compositions
When rainbows appear, use them as a compositional element rather than just a bonus. Position the rainbow to lead the eye or frame the falls.
Vertical vs. Horizontal
The falls' height lends itself to vertical compositions, but don't ignore horizontal shots that capture the width and context. Experiment with both orientations.
Panoramic Stitching
The falls are too wide to capture in a single frame from many viewpoints. Shoot a series of overlapping images and stitch them together in post-processing for stunning panoramas.
Post-Processing Tips
Managing Dynamic Range
Use the shadow and highlight sliders aggressively to recover detail in both bright mist and dark rocks. This is where shooting in RAW format pays off.
Enhancing Rainbows
Carefully increase vibrance and saturation to make rainbows pop, but avoid overdoing it. The HSL (Hue, Saturation, Luminance) panel allows you to target specific colors.
Dealing with Mist
The mist can create a hazy look. Use the dehaze slider carefully to add clarity, but don't overdo it or the image will look unnatural.
Sharpening
Apply appropriate sharpening, but be careful with areas of mist and spray where over-sharpening creates artifacts.
Cropping and Straightening
Ensure horizons are level (unless deliberately tilted for effect). Don't be afraid to crop to improve composition – you don't need to include everything in every shot.
Black and White Conversion
Victoria Falls can be stunning in black and white, emphasizing the contrast between water, mist, and rock. Experiment with black and white conversions for a different aesthetic.
Smartphone Photography Tips
Modern smartphones can capture excellent Victoria Falls images with a few considerations:
Use HDR Mode: Enable HDR to handle the extreme dynamic range.
Clean Your Lens: The lens gets dirty quickly from spray and fingerprints. Clean it frequently.
Waterproof Case: Essential during high water season. Even water-resistant phones can be overwhelmed by the constant spray.
Avoid Digital Zoom: Get closer or crop in post-processing rather than using digital zoom, which reduces quality.
Use Burst Mode: Capture multiple shots to ensure you get at least one sharp image.
Third-Party Apps: Consider apps like ProCamera or Halide that offer more manual control over exposure and focus.
Photography Etiquette and Safety
Respect Other Visitors: Popular viewpoints get crowded. Don't monopolize spots – take your shots and allow others their turn.
Watch Your Gear: Theft can occur at tourist sites. Never leave gear unattended.
Stay on Designated Paths: Venturing off paths is dangerous and illegal. The rocks are slippery, and the consequences of a fall are severe.
Protect Wildlife: The rainforest around the falls is home to various wildlife. Don't disturb animals for photos.
Be Aware of Your Surroundings: When focused on photography, it's easy to become unaware of your surroundings. Watch for slippery surfaces and keep track of your belongings.
Planning Your Photography Visit
Allow at least two full days for photography – one for each side of the falls. Visit viewpoints at different times of day to capture varying light conditions. Early mornings offer the best combination of good light and fewer crowds.
Consider booking a guided tour for your first visit to learn about the best viewpoints and optimal times, then return independently for dedicated photography sessions.
Check the current water levels before your trip to set appropriate expectations and plan your approach. High water season requires different preparation than low water season.
Conclusion: Capturing Your Victoria Falls Masterpiece
Victoria Falls offers endless photography opportunities, from the raw power of high water season to the revealed structure of low water months, from ground-level viewpoints to aerial perspectives. The key to success is preparation, patience, and persistence.
Don't get discouraged if your first attempts don't match your vision – Victoria Falls is challenging to photograph, and even professionals need multiple visits to capture their best work. Focus on experiencing the falls while documenting your journey, and you'll return home with images that capture not just the visual spectacle but the emotion and wonder of this incredible natural wonder.
Ready to capture your own Victoria Falls masterpiece? Explore our range of photography-friendly activities including helicopter flights, guided tours, and unique viewpoint access to help you get those perfect shots.
Remember: the best camera is the one you have with you, and the best time to photograph Victoria Falls is whenever you can get there. Now get out there and start shooting!
Ready to Experience Victoria Falls?
Explore our curated selection of activities and start planning your unforgettable adventure today.